
Google App Engine is a PaaS(Platform as a Service) provided by google. To develop and deploy application in app engine the first and foremost thing to do is creating a app engine account. Creating a Google App Engine account is so simple if you already have a gmail account. You can sign in to app engine account here.

Once you login you will be shown a welcome message and a create application button.
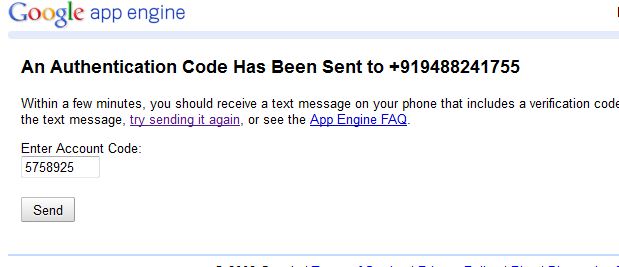
 Click the create application button. you will be asked to submit your phone number. This number can only be used for one time. You cannot create another app engine account with the same number. Once you submit the phone number, a code will will be sent to your number and you will be redirected to a page to enter the code. Enter the received code from your mobile and hit send.
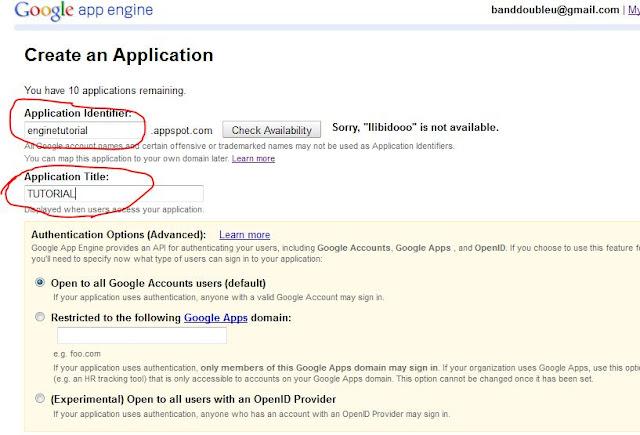
 You will be asked to enter the the application identifier. Identifier will be followed by identifier.appspot.com. Using this id anybody can access your application. I have deployed a sample Text search application in app engine using java. www.multicloudapp.appspot.com .Here multicloudapp is the identifier. Next you have to enter the title of the application. It is just to identify your application. It has nothing to do with the deployment. Agree the term and conditions and hit the create application button. That's it !!you are done.Now you have successfully created your first application.
You can create ten applications for free. You can manage your applications.
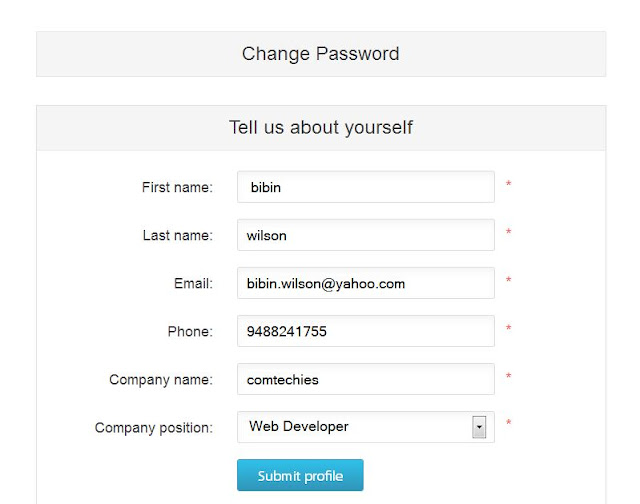
 Next step is to develop the application. You can develop the application two ways. Either you can develop it locally in your computer and deploy it in app engine or you can use EXO-cloud-ide to develop applications in cloud and then from there you can directly deploy it in to app engine.Cloud-IDE has same look and feel like eclipse IDE. The only difference is you will code in cloud rather than in ya local IDE. You can deploy your applications in various PaaS platforms using cloud-IDE. It is quite easy. First you have to create an account with cloud-ide you can create an account here. www.cloud-ide.com. enter the valid detail and hit join.

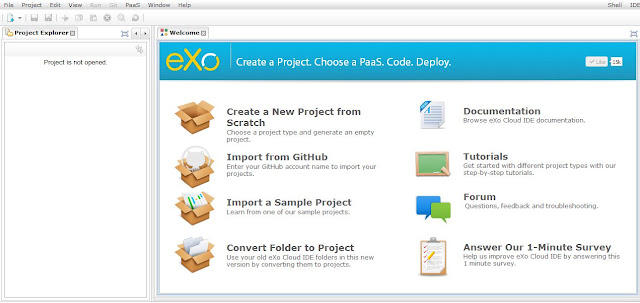
Now you are done with the cloud-ide account. when ever you want to login just type your cloud-ide domain name. eg: www.comtechies.cloud-ide.com. Once you login you will see the IDE which has the same look and feel like eclipse IDE. There you will see the basic tutorials to use the cloud-IDE. Once you browse through that tutorials you will come to know the various options of Cloud-IDE. It supports various language such as html, java, ruby, javascript etc..Code auto completion is also available.
Now am goin to explain how to deploy a basic text search java application in google app engine using Cloud-IDE.
Name your application. I have given the name as "tutorial". Hit finish button now. In the deploy to option when click the drop down menu and select the google app engine and hit "finish"
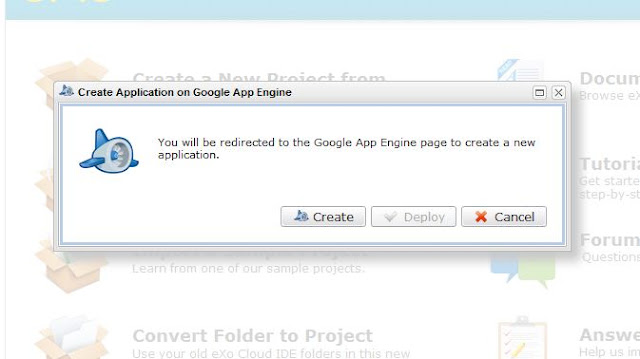
 Once you hit finish you will be asked to authenticate with app engine. hit "aunthenticate" button. you will be redirected to a page. click "allow acess". Now you have integrated app engine with cloud-IDE. Also you can do this by Paas-->google app engine-->login. After logged in go to project and follow the steps explained above. when you select deploy to app engine a box will pop up with options "create" "deploy". Hit the create button , you will be redirected to appengine page. wher you can enter your application name and create the application. I have explained how to create an application at first. Follow those steps to create the application.Once created come back to the IDE tab and click deploy.
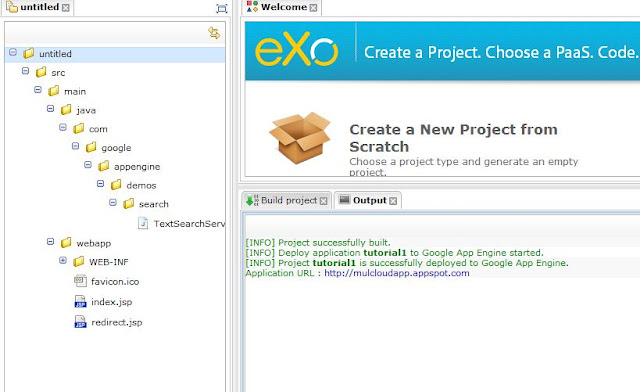
Now your application has been deployed in app engine. Now the coding section. By default there will be a text search java program and few jsp programs. you can edit this code or delte it and create new java files for your desired application. Next step is to run the application. since we have already deployed the application in app engine , automatically when we hit run application it will be executed in app engine.
After you click run ,there will be a small window called "output". A link will be created, which is your app engine application id. e.g. www.tutorial.appspot.com. When you click that link you will see the text search application in a new tab. This is the default application of cloud-Ide. Based on your code the out put will be shown.If there is any error it will be shown. Now you have successfully deployed your application in appengine and created your out put. Using the application id anyone can use that application.

Once you login you will be shown a welcome message and a create application button.


You can create ten applications for free. You can manage your applications.


Now you are done with the cloud-ide account. when ever you want to login just type your cloud-ide domain name. eg: www.comtechies.cloud-ide.com. Once you login you will see the IDE which has the same look and feel like eclipse IDE. There you will see the basic tutorials to use the cloud-IDE. Once you browse through that tutorials you will come to know the various options of Cloud-IDE. It supports various language such as html, java, ruby, javascript etc..Code auto completion is also available.

Now am goin to explain how to deploy a basic text search java application in google app engine using Cloud-IDE.
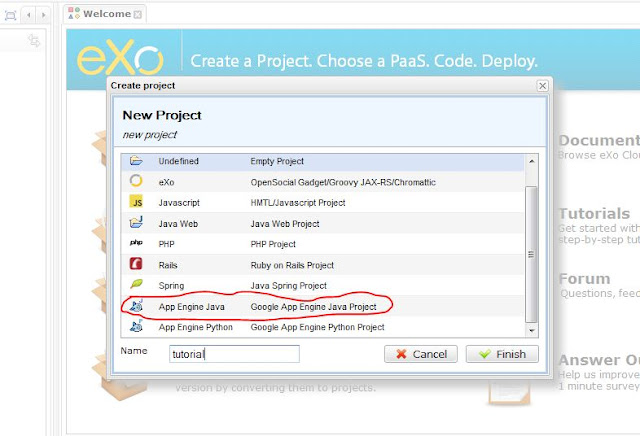
Go to Project-->New-->New Project

Select google app engine java project
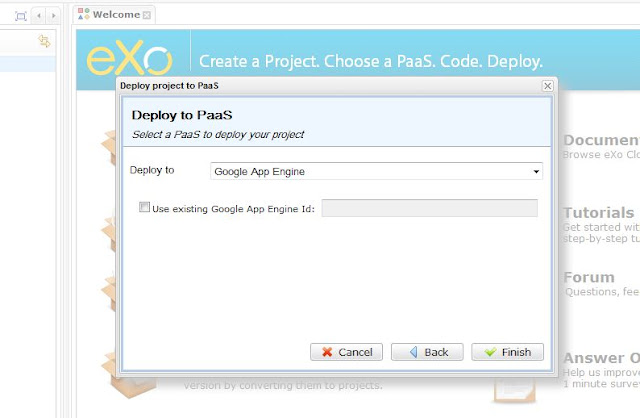
Name your application. I have given the name as "tutorial". Hit finish button now. In the deploy to option when click the drop down menu and select the google app engine and hit "finish"


Now your application has been deployed in app engine. Now the coding section. By default there will be a text search java program and few jsp programs. you can edit this code or delte it and create new java files for your desired application. Next step is to run the application. since we have already deployed the application in app engine , automatically when we hit run application it will be executed in app engine.
Menu-->Run-->Run Application
After you click run ,there will be a small window called "output". A link will be created, which is your app engine application id. e.g. www.tutorial.appspot.com. When you click that link you will see the text search application in a new tab. This is the default application of cloud-Ide. Based on your code the out put will be shown.If there is any error it will be shown. Now you have successfully deployed your application in appengine and created your out put. Using the application id anyone can use that application.

