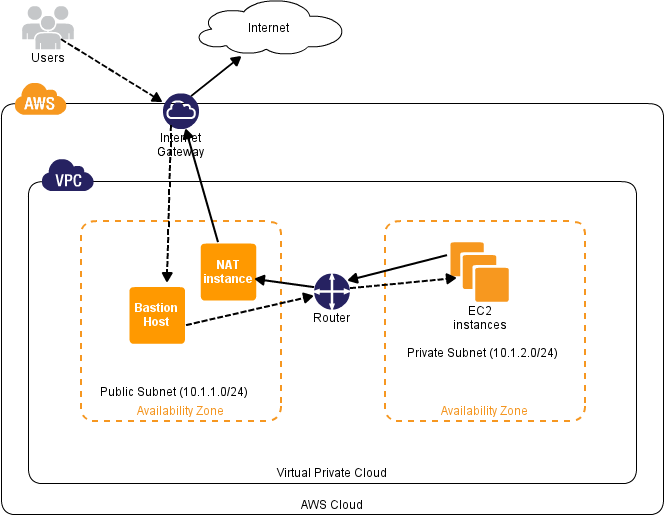
If you want your VPC private subnet instances addressable to internet, you should have a NAT instance configured in your public subnet and all the private subnet traffic should be routed through the NAT instance for internet access.
VPC wizard lets you create a vpc with public and private subnet with a NAT instance by default. However, the NAT instance by default is set to m1.small instance. IF you want a t1.micro NAT instance, then you have to create a vpc with public and private subnets without the wizard.
To create a VPC using AWS cli, follow this tutorial: configure AWS VPC using CLI
Getting started
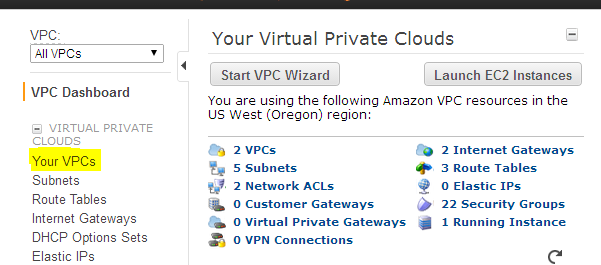
1. Go to AWS management console and navigate to the VPC console.
- Click your vpc’s option
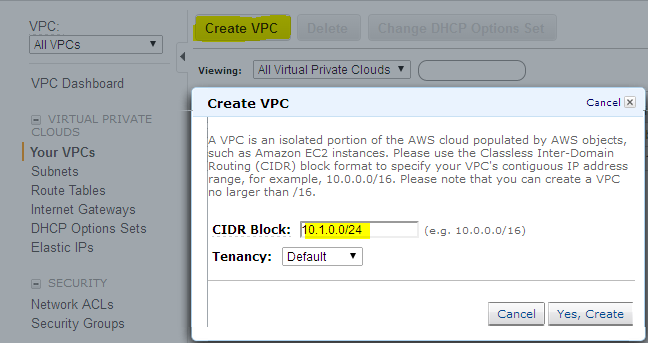
3.Click create VPC , assign a CIDR block (Lets say 10.1.0.0/16) and click create VPC.
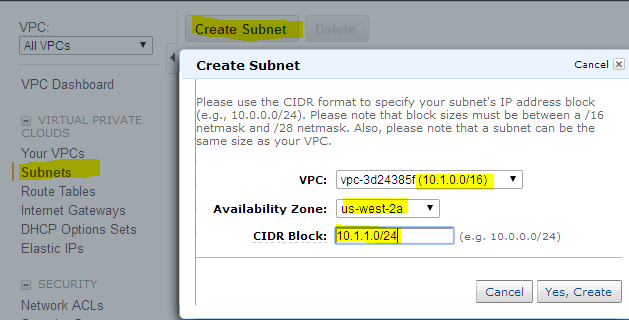
4. Create two subnets, one for public access and the other for private access. The public subnet will contain the NAT instance , so that the private subnet can talk to internet.
- Click the subnet option in the left pane and create two subnets, one at a time, using the create subnet option. Create two subnets in two different availability zones. For public subnet , use 10.1.1.0/24 subnet and for private 10.1.2.0/24 subnet. Make sure you select the appropriate VPC id. In our case, VPC with 10.1.0.0/16 CIDR block.
6. Now we have a VPC with two subnets. If you launch an EC2 instance in any one of the subnet with a public ip, you wont be able to access the instance, because the subnet you want to make public should be attached to an internet gateway. If you use the VPC wizard, these settings will be automatically set, Since we are manually creating the VPC, internet gateway, route table etc,, has to be set manually in order to make the subnet public.
- Go to Internet Gateway option in the left pane, and create one using the create option. Once created, right click it and associate it with your VPC.
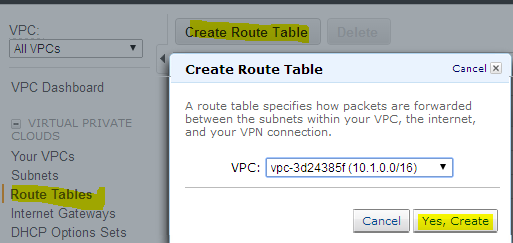
8. Go to route tables option on the left pane , click create route table, select your VPC and click create.
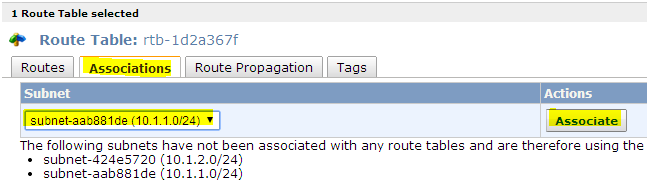
9. Now we have to associate the route table to the subnet which has to be made public. Once associated , make a route table entry to route the subnets traffic through internet gateway (which your created for your VPC) to access internet.
- Select the route table and associate it with your subnet which has to be made puiblic.
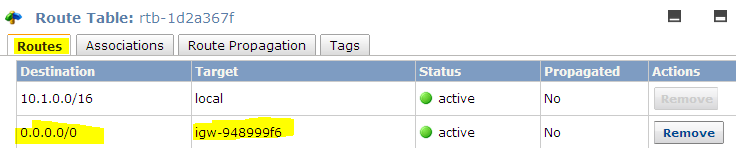
11. Route tables entry shoud have 0.0.0.0/0 as destination and internet gateway as target.
12. Now you will be able to connect the ec2 instances launched in the public subnet (10.1.1.0/24) using the public ip or an elstic ip.
Setting Up NAT instance
Next step is to launch a t1.micro NAT instance to let the instances in private subnet to access internet. AWS has public Linux NAT AMI’s. You can launch those AMI’s in public subnet to act as NAT. You can launch this AMI in t1.micro instance.
-
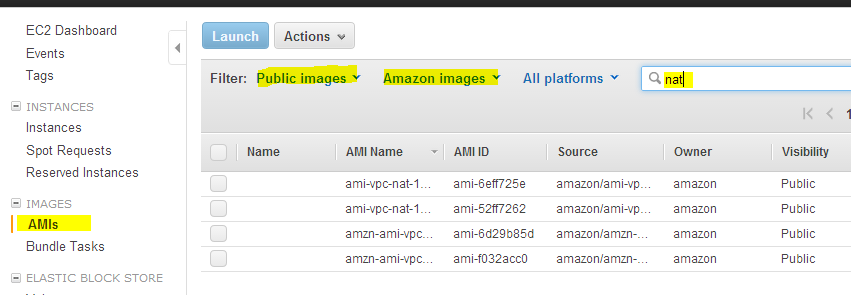
Go to EC2 dashboard and click AMI’s option in the left pane.
-
Search for public amazon images with keyword NAT. You will find four NAT AMI’s.
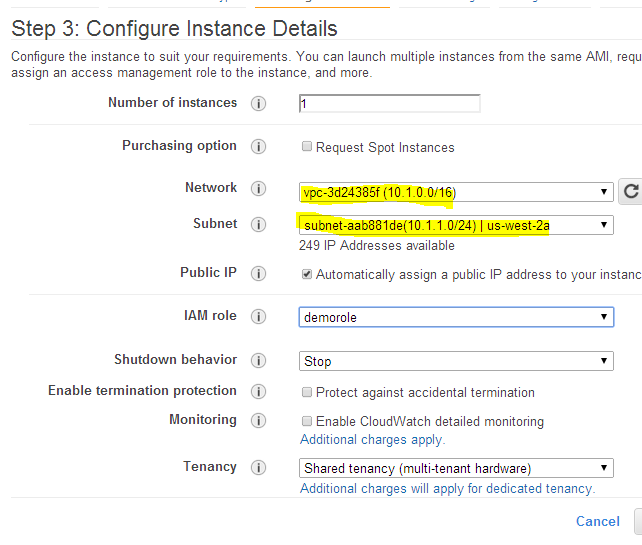
3 . Right click any one AMI and click launch. In the launch configuration select the appropriate VPC and the public subnet you configured. Make sure all the configurations are correct and launch the instance.
4. The Instance will be launched in the public subnet and you will be able to access it suing internet.
Now we have a VPC with public and private subnet. Public subnet has a NAT instance. This instance will serve as a gateway for private subnet to access internet. You cannot ssh in to machines that are in private subnet directly from internet. You can use a jump server for that.
The private subnet should have a route table to route its traffic through the NAT instance to access internet. You can set this rule in main route table, but it’s a good practice to have a separate route table for your private subnets.
- Create a route table and associate it with the private subnet as explained in step 8. Set the destination as 0.0.0.0/0 and target as Instance ID. When you select the instance id option you will have a pop up screen with available instances. Select the NAT instance from the drop down list.
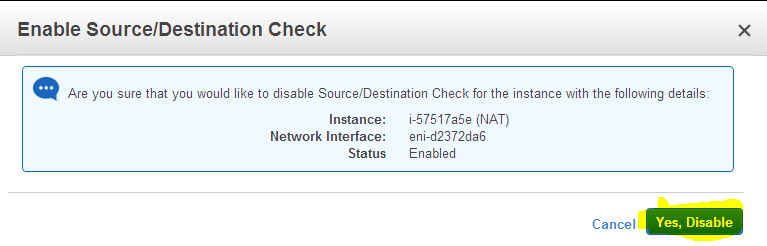
6. Now go to the EC2 dashboard, right click the NAT instance, click “source/destination”check option.
7. Click “disable” option. The source/destination check has to be disabled in the NAT instance to route the traffic from private subnet to internet.
Now you can ssh or RDP in to the machine's residing on private subnet using an instance from public subnet, which you can connect using internet.
Instances in private subnet which needs internet connection can access internet through the NAT instance.
For more AWS tutorials visit the Tutorials Section