
Chef can be used to provision instances on AWS platform. When you provision a machine using chef , knife will automatically install chef-client on that machine using the credentials you provide in the knife.rb file.
Assuming that you have chef server and workstation in place ,in this tutorial am going to explain how you can provision AWS instances using knife cli.
3. Enter the aws access key and secret key details in the knife.rb file to provide the knife ec2 plugin permissions to access the aws api’s associated with your account.
4. Open the knife.rb file present in the .chef folder and enter the following credentials and save it.
Assuming that you have chef server and workstation in place ,in this tutorial am going to explain how you can provision AWS instances using knife cli.
Getting started:
1. Open the terminal and install the knife-ec2 plugin using the following command.
Gem install knife-ec2 (or)
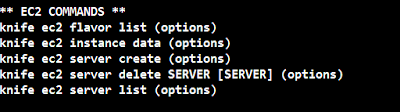
/opt/chef/embedded/bin/gem install knife-ec22. Once the gem is installed ,you can see the available knife ec2 commands using knife ec2 –help command
4. Open the knife.rb file present in the .chef folder and enter the following credentials and save it.
knife[:aws_access_key_id] = "Access key of you AWS account"
knife[:aws_secret_access_key] = "Secret Key of you AWS account"
knife[:aws_ssh_key_id] = 'KEY_ID'
knife[:region]= "region"
aws_ssh_key_id is the name of the existing key pair in your aws account. This key is used to provision new instances using knife. All the machines provisioned using the knife ec2 plugin can be accessed using the key you mentioned in the knife.rb file.
Region is the id of AWS region where you want your machine to be provisioned. Eg: Oregon us-west-2
5. Copy the ssh key example.pem (key pair downloaded from AWS and also mentioned in the knife.rb file) to the .ssh folder of your workstation. For windows C:UsersAdministrator.sshexample.pem , for linux ~/.ssh/example.pem
Provisioning and deploying a role in a node
Knife ec2 server create command is used to provision an EC2 node.
The following command provisions a Ubuntu 13.10 t1.micro type node in AWS Oregon region and installs the chef client , registers the node with chef server and applies the webserver role to the node.

knife ec2 server create
--node-name chef-ec2-ubuntu13.10
--flavor t1.micro
--image ami-ace67f9c
--identity-file c:/Users/Administrator/.ssh/example.pem
--run-list "role[webserver]"
--ssh-user Ubuntu
--node-name is the name applied to the AWS node in AWS console as well as the chef server.
--flavor is the AWS instance type
--imageimage is the ami id of the instance. ami-ace67f9c is the ami id of Ubuntu 13.10 image.
--identity-file is the location of the AWS key pair in your workstation.
--run-list run-list holds the recipes or roles you want to apply to the provisioned node. In this tutorial the role webserver installs apache2 webserver on the provisioned Ubuntu node and brings up a static website from the files provided in the cookbook.
--ssh-user is the user name for the provisioned instance, this is required to bootstrap the node after it is provisioned. User name varies based on the image type. Eg: ec2-user for RHEL machines , Ubuntu for Ubuntu machines and root for suse machines
Knife ec2 server list gives you the list of provisioned AWS instances.

Deprovisioning the node
You can deprovision a node using knife ec2 server deletecommand.
Knife ec2 server delete i-421aa075 deprovisions the node with id i-421aa075. The machine will be terminated from AWS. If you want to delete the node and client details from the chef server , then you have to add the –purge flag to the command.
Knife ec2 server delete i-421aa075 --purge
