A Pod is a small deployable unit that has a running container, inside a Pod, we can run one or more containers.
Step 1: Create a Pod with a Single Container
I am showing a small example of a Pod creation using the imperative command method.
A Pod with a single container using a Busybox image.
kubectl run test-pod --image busybox --command sleep 3200test-pod is the name of the Pod
busybox is the image name
sleep 3200 is passing commands as arguments on runtime.
Once the Pod is created, you can list the Pods using the following command.
kubectl get pods -o wide
Every Pod will get an IP address for communication, and this will assigned by a Container Network Interface (CNI)
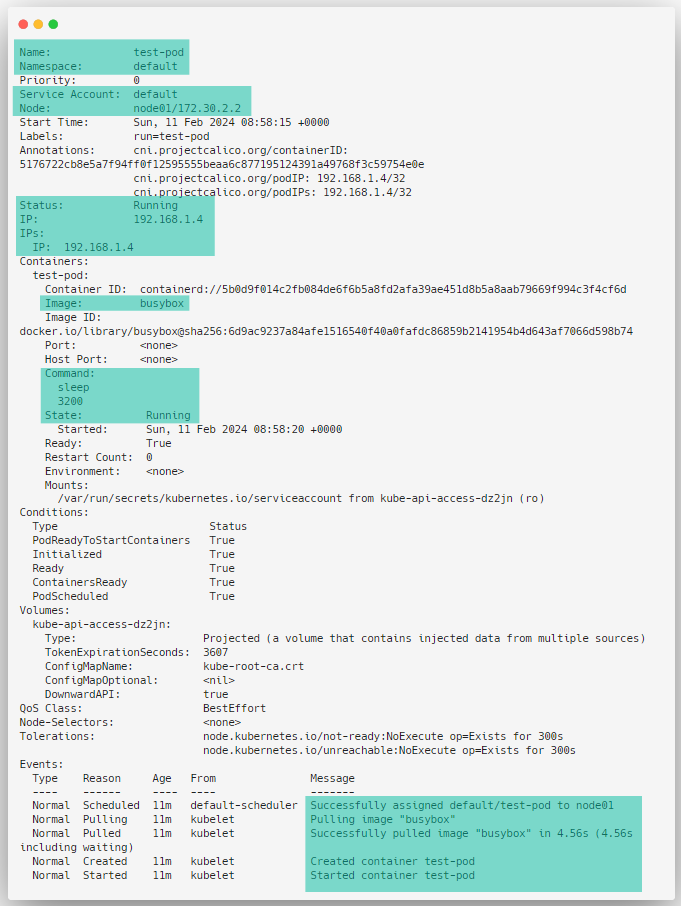
Node tab will indicate in which Node our Pod is running.
If the Pod is working without any issue, we can see that on status as Running.
If the Pod status has something else like Pending, Error, etc, or if we want to know more details about the Pod then we can describe the Pod to get information.
kubectl describe pod test-pod
Step 2: Create a Pod with Multiple Containers
Sometimes two or more containers have to be placed very near for efficient communication.
There are some advantages are there of running multiple containers on a single Pod such as communicating with the same IP, sharing the same volume, etc.
For example, if a Nginx container is running on a Pod and generating logs, meanwhile if a Sidecar container which is a logging agent is running alongside Nginx then the log collection process will be more simplified.
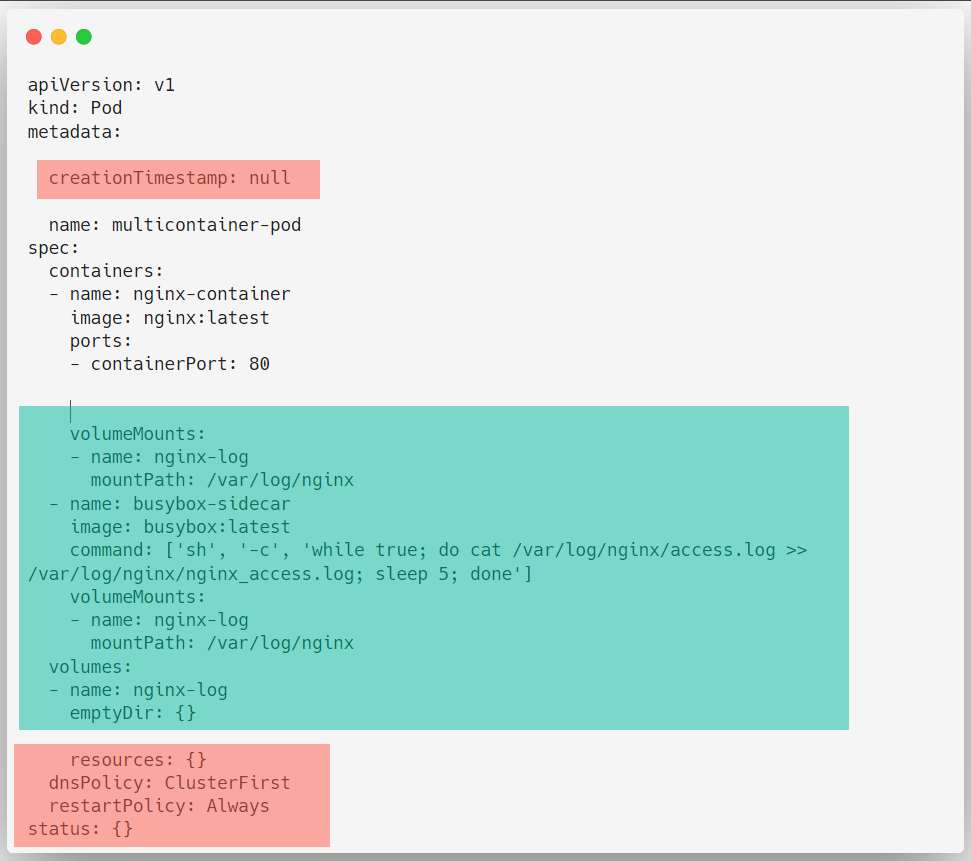
We cannot directly create a multi-container Pod using the imperative command so I am creating a manifest file using the imperative command and will make modifications to it as a declarative method.
kubectl run multicontainer-pod --image nginx --port 80 --dry-run=client -o yaml > pod.yamlThis command will create a manifest for a single container Pod so we have to edit the manifest to add another container information.
vim pod.yaml
After adding required fields and removing unnecessary parameters you can save and exit.
To deploy this manifest, you can use the following command.
kubectl apply -f pod.yamlAfter successfully deploying the Pod we can list.
kubectl get pods -o wide
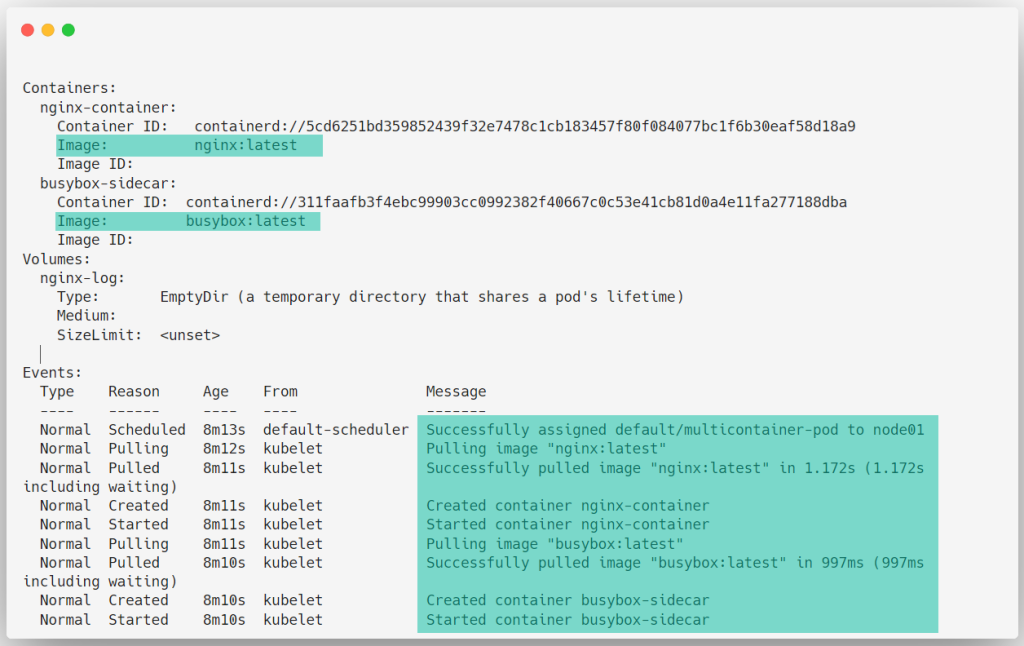
Let's describe the Pod to get more details
kubectl describe pod multicontainer-pod
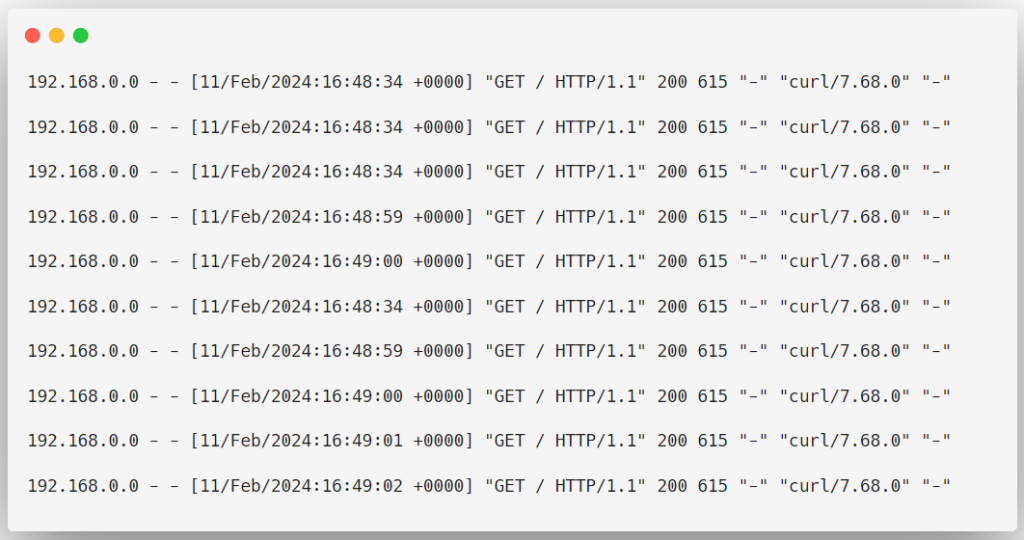
Now, we can test that the Busybox container is getting the logs from the Nginx container.
kubectl exec -it multicontainer-pod -c busybox-sidecar -- tail /var/log/nginx/nginx_access.log
Conclusion
Multi-container Pods are useful for certain situations and there is a lot more configuration you can do with the Pod configuration.
To know more about the Pods, please visit the official documentation.
