
In this blog, we are going to look at how to create a Static Pod on your Kubernetes Cluster.
Step 1: Find the Static Pod Location
Yes, there is a specific path available for Static Pod manifests, we don't have to manually up them, they will be launched by Kubelet when the cluster starts up.
Kubelet is a daemonset, so it will be available on each Node, it can up the Pods without the help of the Controlplane.
By default, there are some Static Pods are available,
Let's see where are they.
ls /etc/kubernetes/manifests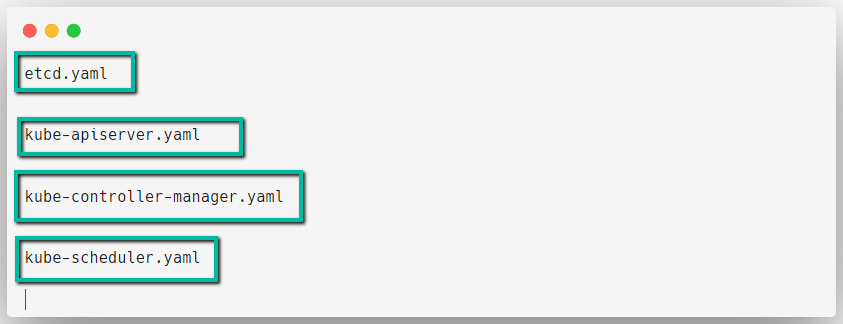
These are the default Static Pod manifestes available on the Kubernetes and they are necessary to run the Controlplane.
- etc: Key-value store, used to store the Kubernetes data
- kube-apiserver: This is used to interact with the Kubernetes APIs
- kube-controller-manager: Variours controllers are available on Kubernetes and this component is necessary to manage them.
- kube-scheduler: Schedule the Pods on the Nodes.
Let's list the Pods.
kubectl get po -n kube-system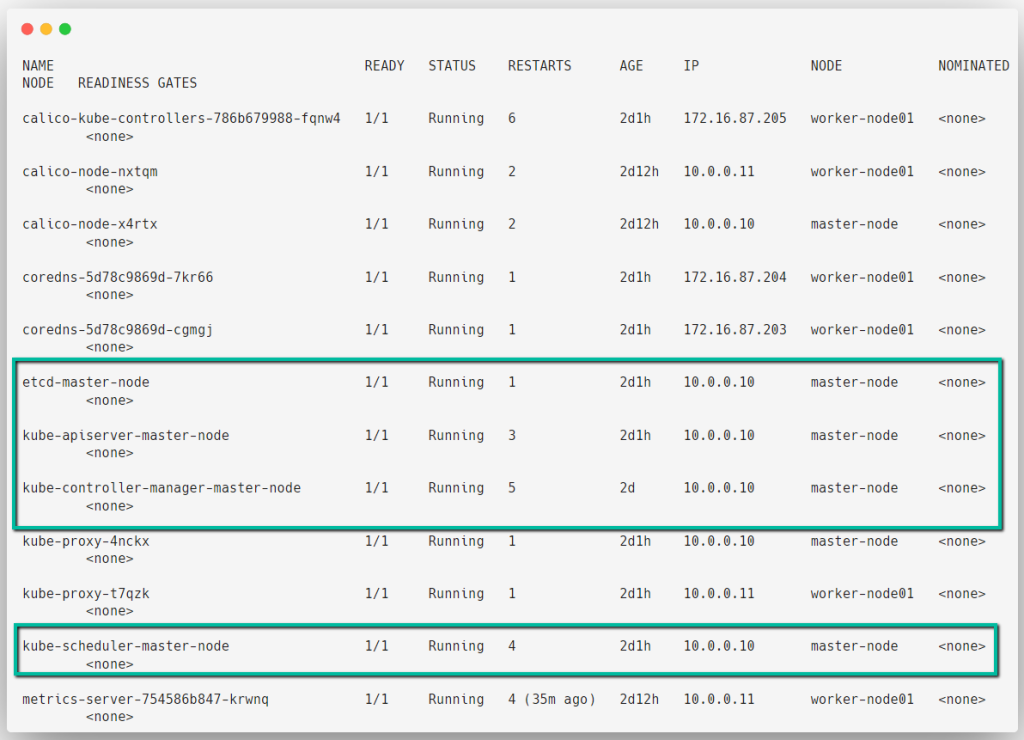
Here, you can see that all the Static Pods are running on the Master Node because they are the necessary components of the Master Node.
But, we can create Static Pods on other Nodes as well.
These Pods will run on the system Namespace, which is kube-system.
Step 2: Create a Static Pod Manifest
I am also going to create a Nginx Static Pod on the Master Node, but you can create it on other Nodes as well.
kubectl run static-pod --image=nginx --dry-run=client -o yaml > static-pod.yamlThe manifest will be created on your current working directory.
You can edit the manifest if you want.
vim static-pod.yaml
I just have edited the version of the Nginx and saved the manifest.
Step 3: Validate the Manifest
You can even use external tools to validate your Kubernetes YAML manifest.
For this, I am using the Kubeval utility.
To install this, use the following command.
wget https://github.com/instrumenta/kubeval/releases/latest/download/kubeval-linux-amd64.tar.gz
tar xf kubeval-linux-amd64.tar.gz
sudo cp kubeval /usr/local/bin
To validate the YAML manifest, use the following command.
kubeval static-pod.yamlStep 4: Deploy the Static Pod
Here, we are not going to perform kubectl apply command to launch this Pod, instead of that I am moving this manifest to the /etc/kubernetes/manifests directory.
sudo mv static-pod.yaml /etc/kubernetes/manifestsLet's check the Pods now.
kubectl get pods -o wide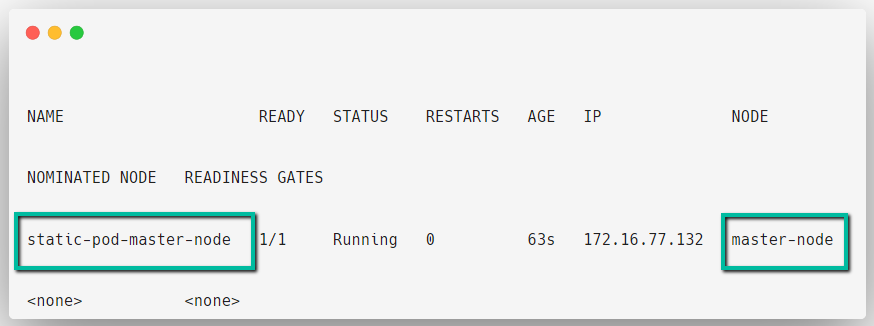
The Pod is automatically launched, this is how we deploy the Static Pods.
To get more details of the Pod, use the following command.
kubectl describe pod static-pod-master-node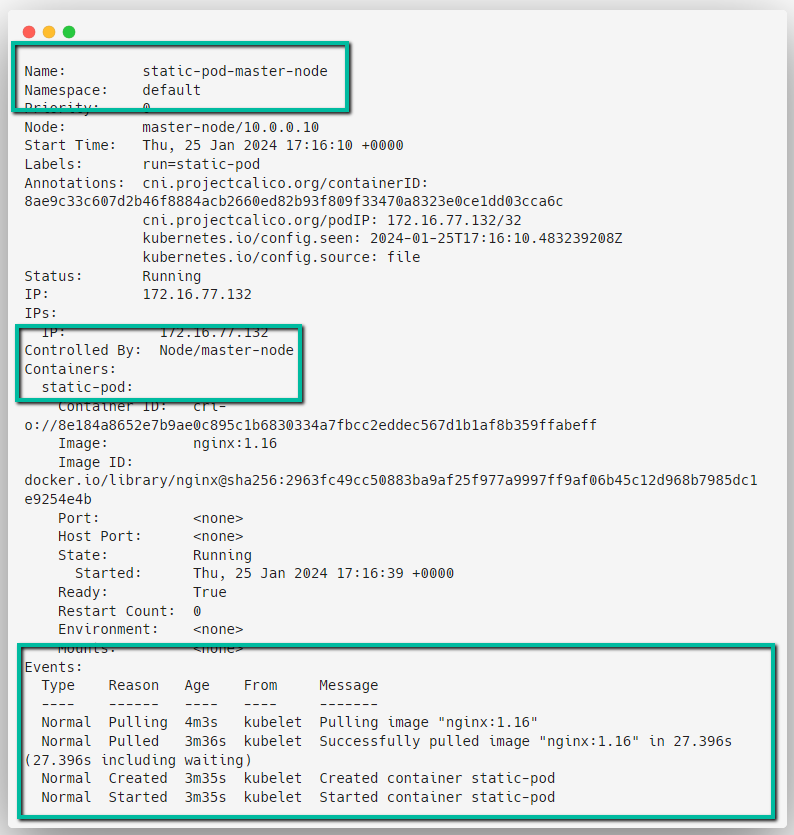
Step 5: Test Static Pod
You might be thinking what happens when the Static Pod deletes?
Let's try that.
kubectl delete pod static-pod-master-node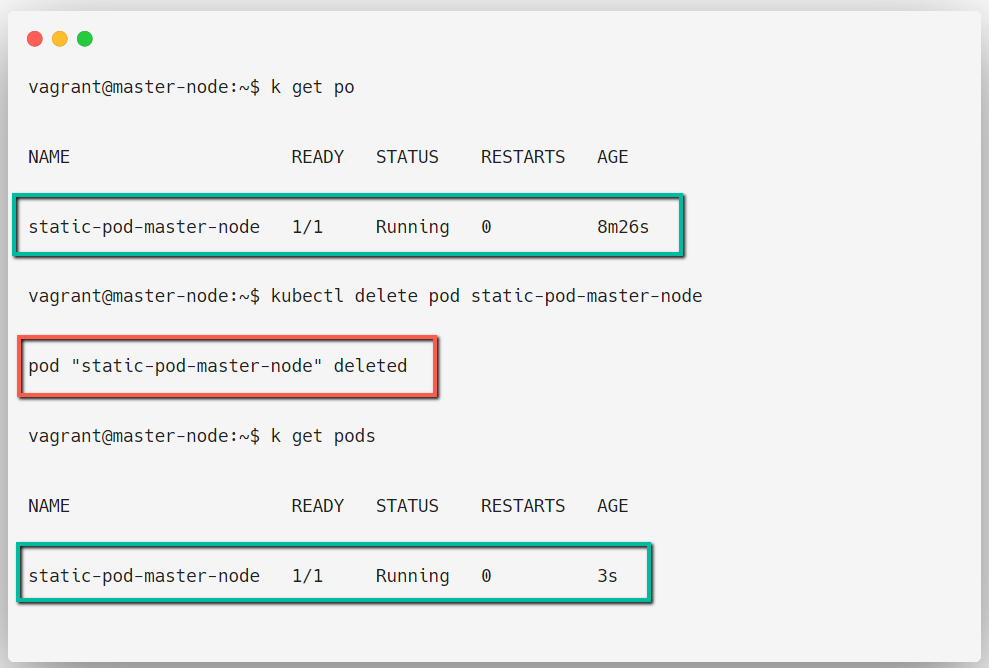
The Pod will be created again and again until the manifest is deleted from the /etc/kubernetes/manifests.
If the Node deletes then the Pod also be deleted.