


High-performance WordPress is a must-have for bloggers who have substantial income from their blogs.
People who cannot pay a lot for managed WordPress services opt for a cloud or a VPS service to host their WordPress sites.
The best configuration for WordPress on a cloud/VPS or a dedicated server is a combination of Nginx, Apache, and MySQL.Nginx will act as a reverse proxy. The working of this combination is explained here.
You can manually configure Nginx + Apache + Mysql individually on a VPS and host your WordPress website.
However, if you do not know what you are doing, I would highly suggest not to do it. You should have very good system administration skills to host it in a secure and scalable manner.
Setting Up High-Performance WordPress on Cloud/VPS
There are many server configurations that decide the performance and security of WordPress websites.
When it comes to WordPress installation on a cloud, most people would just blindly install a LAMP stack and host their WordPress websites.
Once the server gets hacked if the site loads slowly or if they face SEO challenges they realize that they have done something wrong in the configuration.
There are server optimizations, user management, file permissions, web server security, and many more things that have to be done for resilient hosting.
If you are not very good at system administration, you can choose the Serverpilot service. Even though I am a Cloud System Engineer by profession, I use Serverpilot for all my websites.
It saves a lot of time for me by automating all the server configurations. All you have to do is, sign up for the account, give your server credentials and Serverpilot will set up a scalable and secure backend tech stack to host your WordPress application. And it's completely free for all the application configurations and app creation.
Using Serverpilot, you can host multiple WordPress sites on a single server with ease. It acts as a control panel for creating and managing WordPress and other PHP-based applications. You can also manage MySQL databases, users, etc...
Setting Up WordPress on Cloud/VPS
Here I have explained the steps with screenshots for setting up a WordPress website using serverpilot.
If you are using AWS ec2 servers, you will not have password-based authentication by default. You can this blog post for setting it up -- > Setting up password authentication on ec2 servers
Step 1: Sign in to Serverpilot account and click the "connect to server" option.

Step 2: Enter your server or VPS public IP address, password, and an SFTP password that you want to use in the future.
Click the "connect to serverpilot" option. Serverpilot will connect to your server and install all the necessary software and utilities required to host the WordPress application. It will take a few minutes for the process to complete.

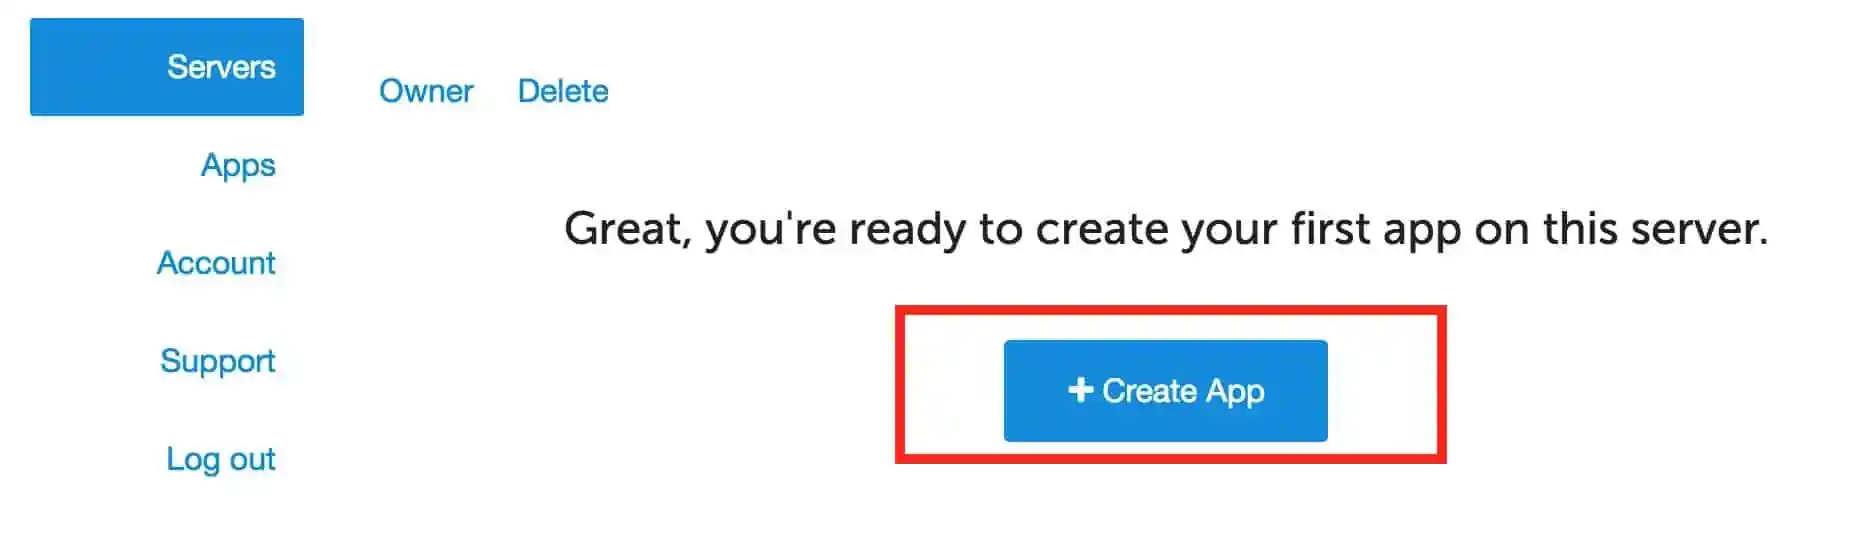
Step 3: Click the "Create App" option.
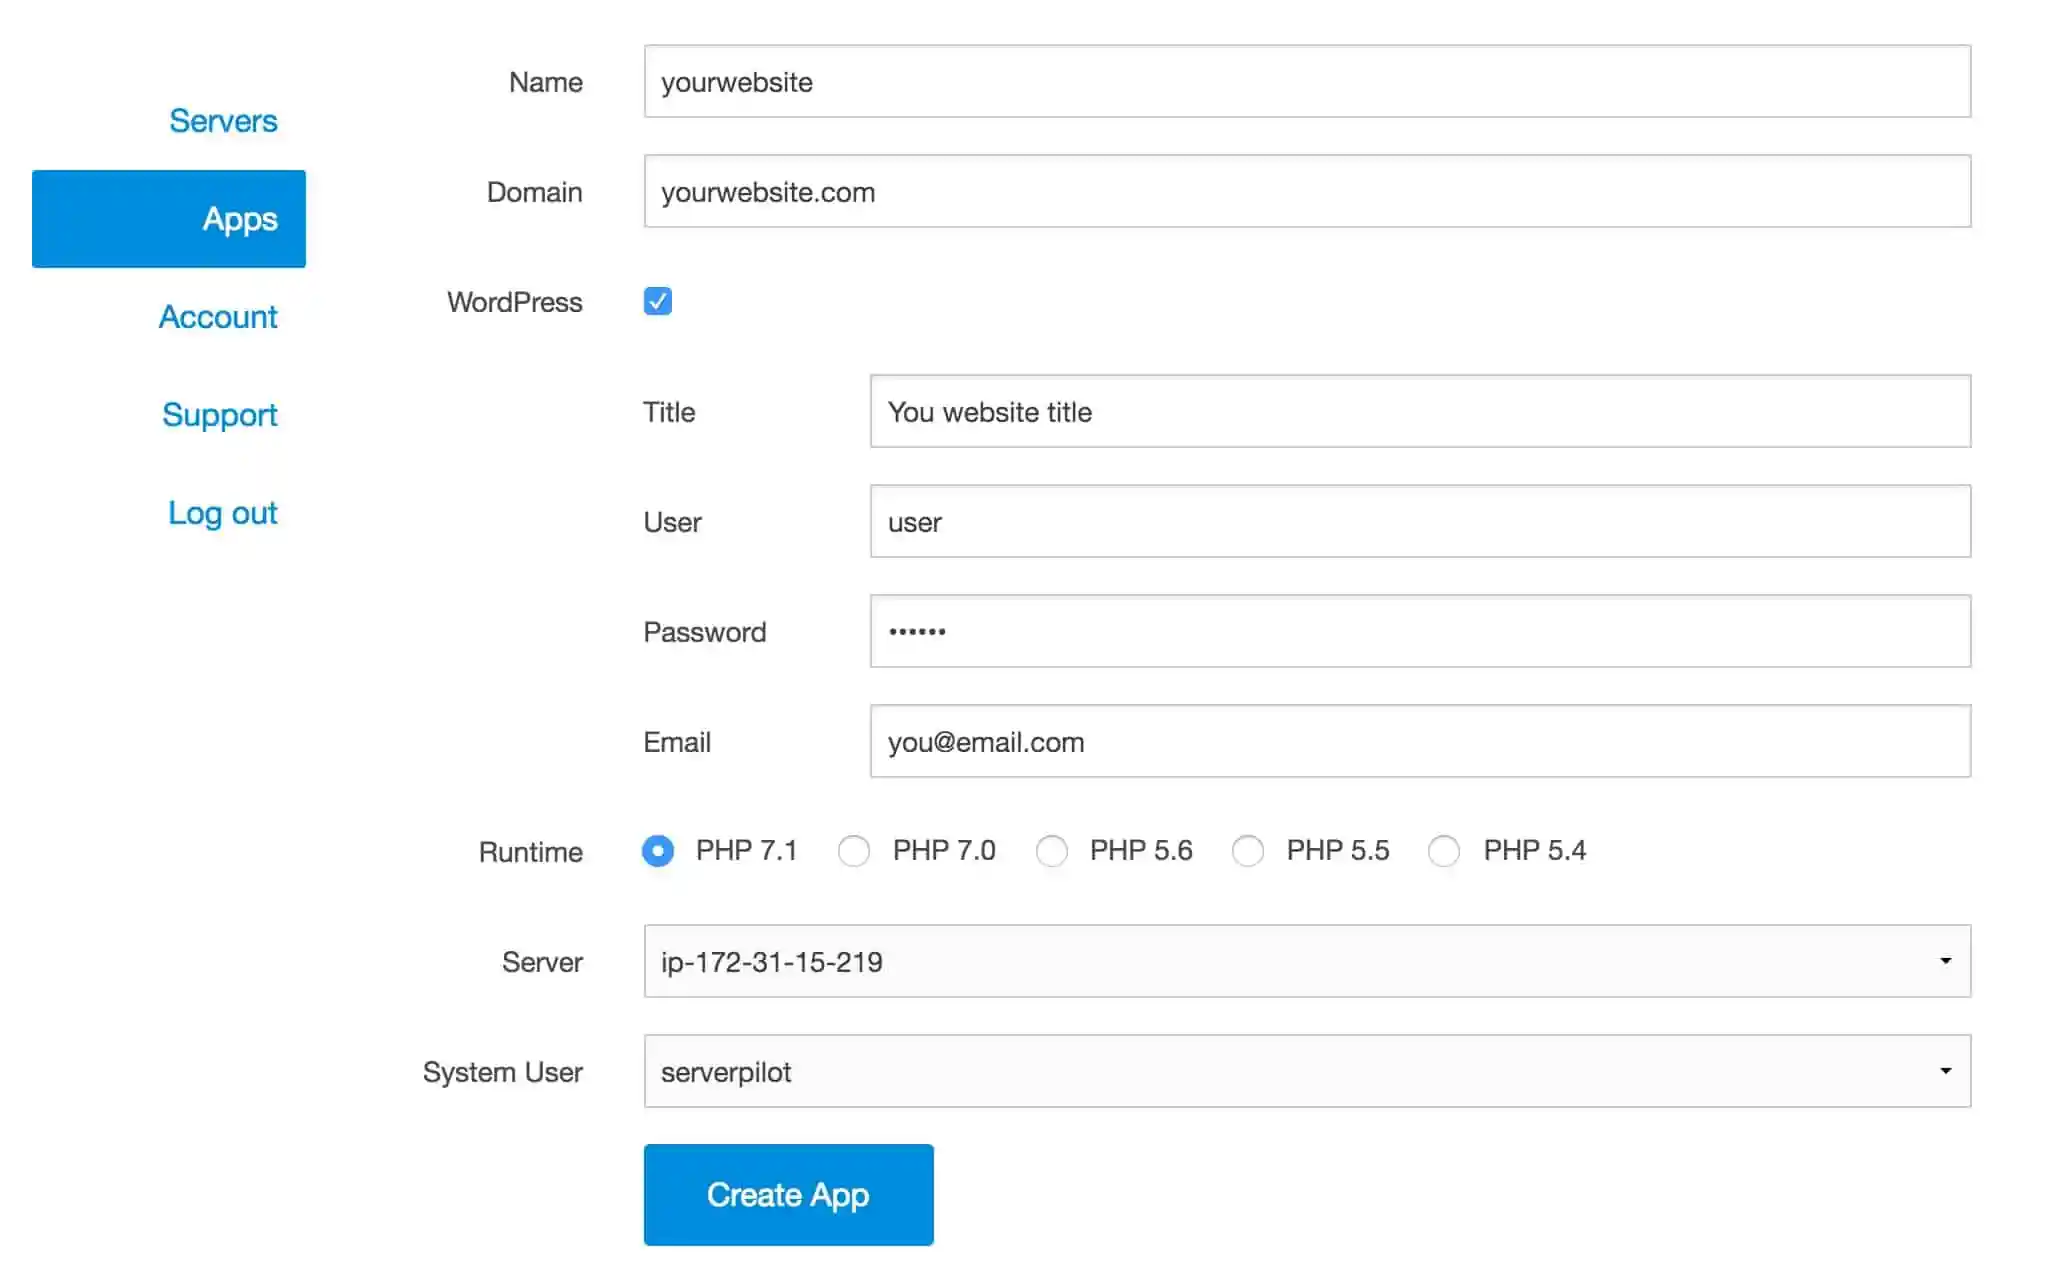
Step 4: On the next page, enter your domain details and select the WordPress option. Enter the username and password you require for the WordPress admin page. Also, select the latest PHP version. Click "Create app" once you entered all the details.
That's it! WordPress is successfully installed on your server. Now, if you visit the public IP address of your VPS, you will see the default WordPress page. And you can access the WordPress admin page at https://<IP>/wp-admin
This setup would give you a high-performance WordPress website. However, if you are a tech person, you can tweak it more to have optimal performance.
Also, make sure if you make any changes through SFTP, make sure you do it as a server pilot user and not as the system root or admin user.
Use Caching Plugin
To optimize the WordPress website static assets delivery, you should use a WordPress caching plugin. We use the WP Rocket plugin on this website for caching. It is a very good caching plugin with user-friendly settings. You will see a drastic change in WordPress site load time after setting up WP Rocket. You can check out WP Rocket Plugin Review for more information.
If you need any help with this setup, please contact me at admin@comtechies.com
