

SSL has become a mandate for blogs and websites. Google recommends using SSL for websites. Some claim that it might help you in good search engine rankings as well.
In this blog, I am using the free SSL service provided by CloudFlare. If you don not have any financial transaction on your blog or website, this free SSL will suffice your needs.
I have setup free SSL (https) for one my WordPress sites and have noted down all the steps. You can follow this tutorial for an end to end SSL setup.
Setup Free SSL (https) for Wordpress
To setup free SSL, your site should be running on CloudFlare. If you are not using it, you need to signup for it and setup your website on CloudFlare. If you don't have the CloudFlare setup, you can follow this tutorial
What will you need?
Before starting the setup, I assume you have the following.
- A Wordpress website/blog running using CloudFlare CDN.
- You have admin access to the blog.
- You know how to install and activate WordPress plugins.
- Take a complete backup of your website.
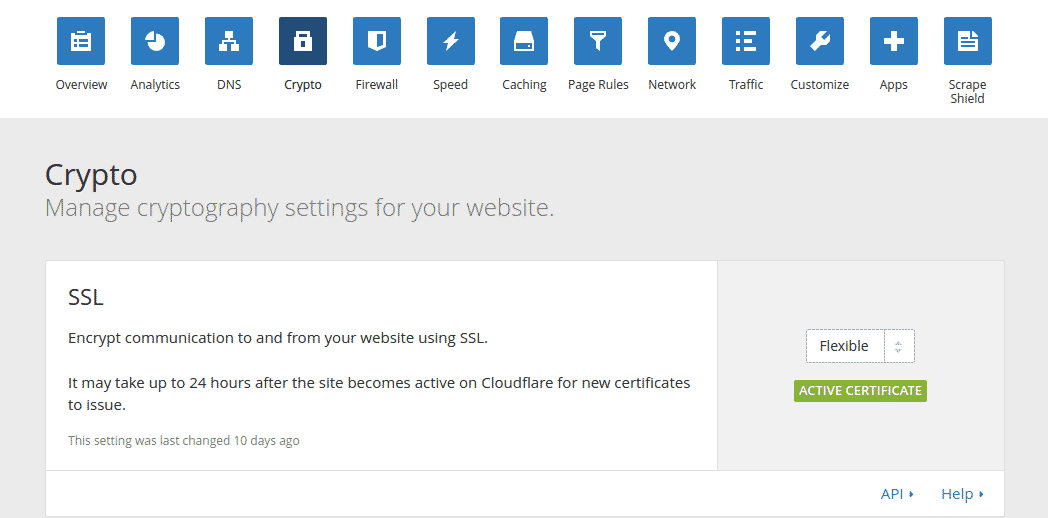
Step1: Go to CloudFlare dashboard, under crypto, make sure you have "Flexible" option enabled and it is is "Active Certificate" mode. For fresh CloudFlare account, the SSL certificate activation will take 15 to 30 minutes.
Step 2: Install and activate "CloudFlare Flexible SSL" Plugin from your WordPress dashboard.

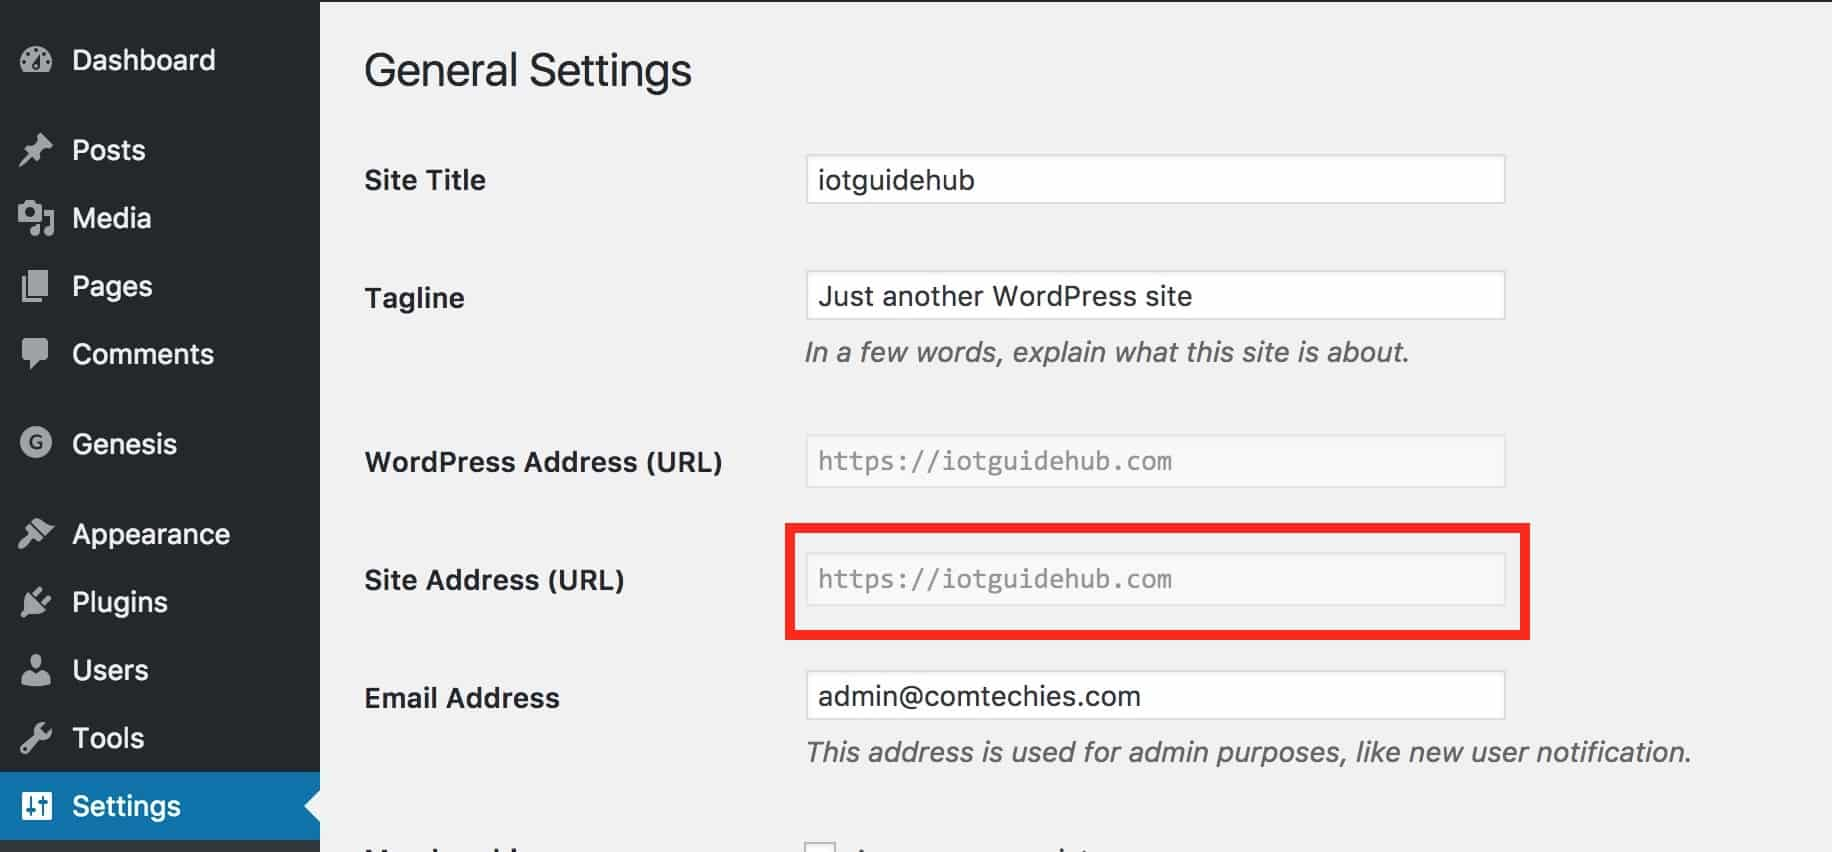
Step 3: In you WordPress admin page, go to settings --> General and change site url from http to https.
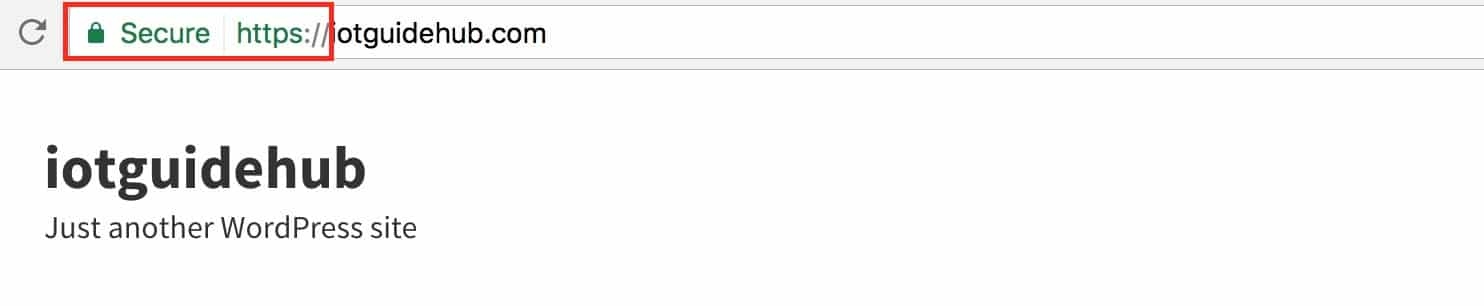
Step 4: Now, visit your site over https URL to make sure it is working fine. The browser should show the green "Lock icon" ash shown in the image below. The green lock icon suggests that your SSL configuration is working perfectly fine.
Step 5: Now head over to CloudFlare dashboard, select "page rules" tab and click "create page rule" option.
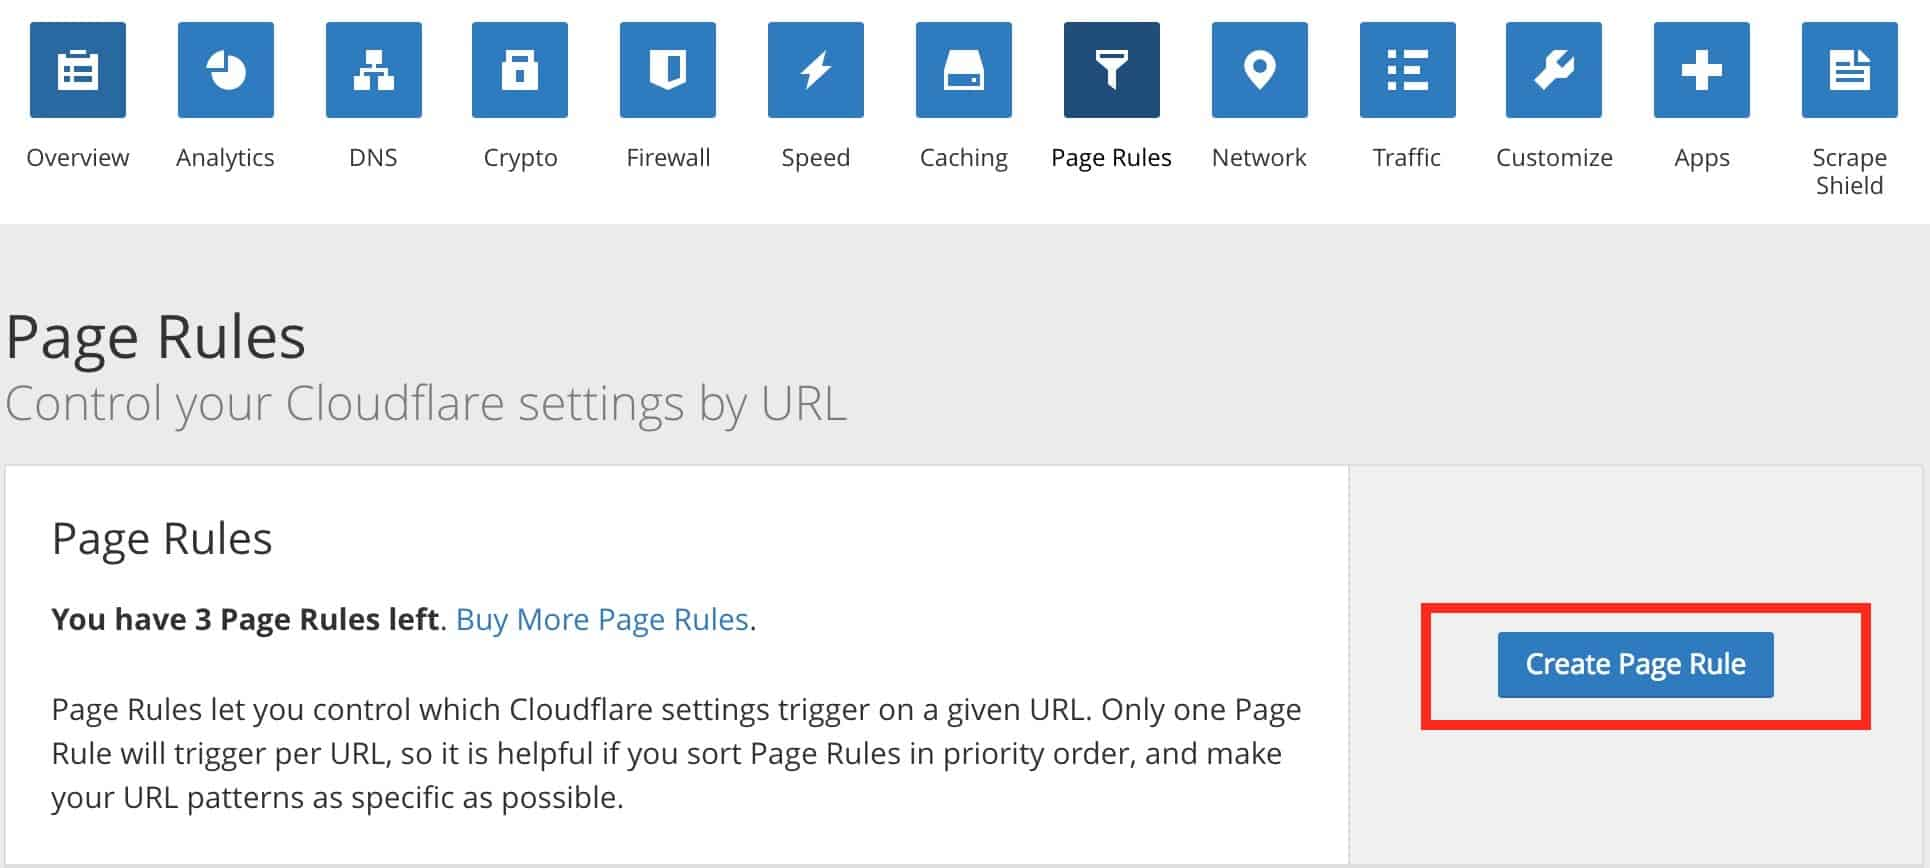
Step 6: Enter your domain name this format. (http://iotguidehub.com). Click "Add string" Option and select, "Always use HTTPS" option and click "save and deploy" option. This will redirect all the HTTP requests to https.

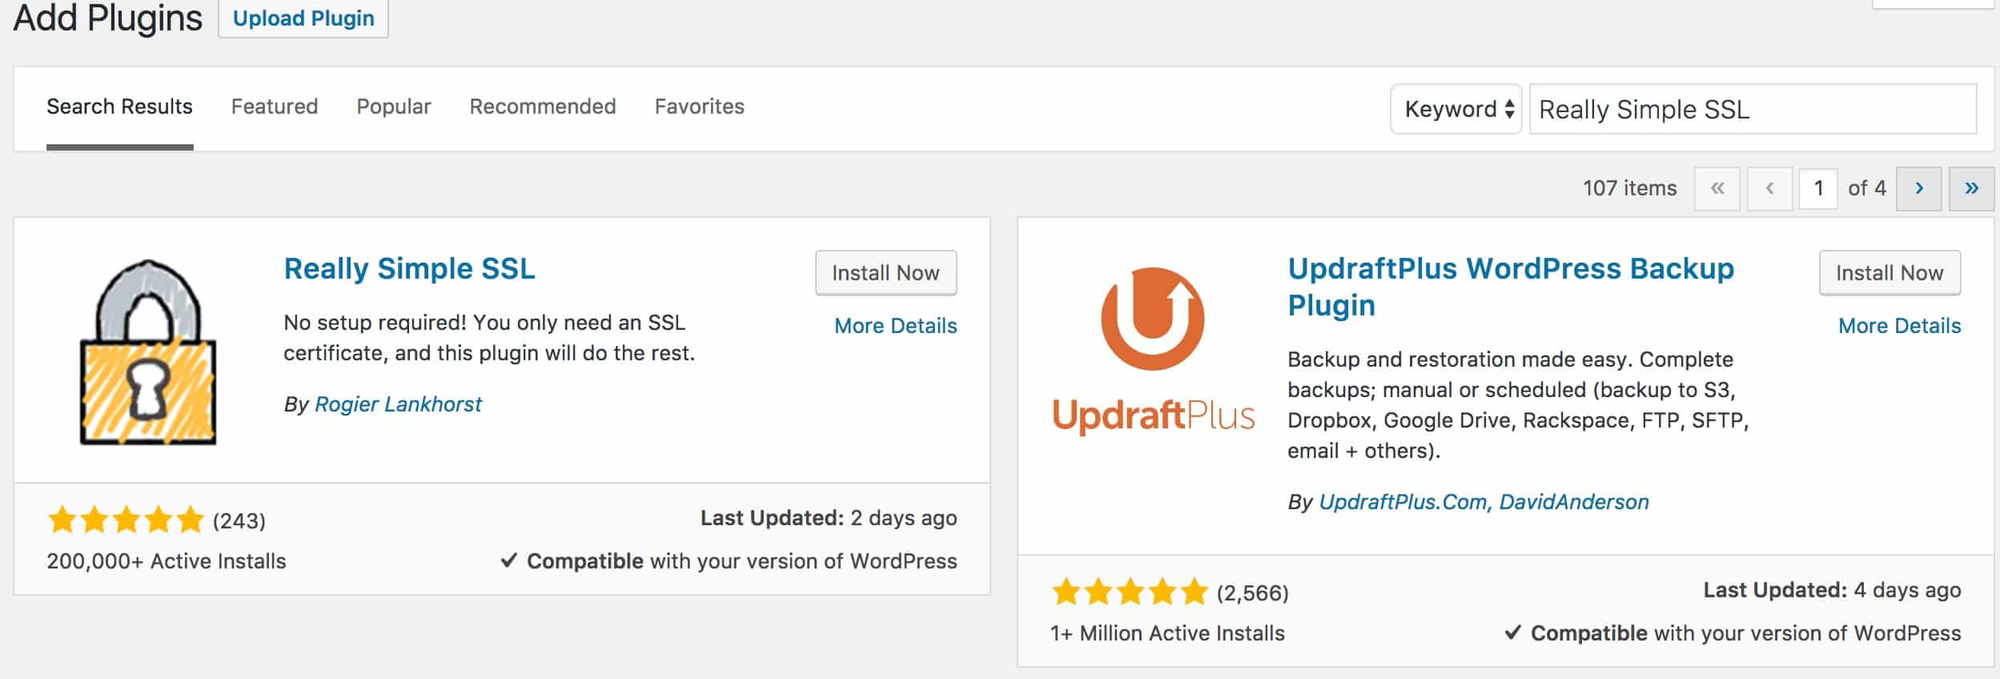
Step 7: If you are setting up SSL for an existing website will lot of content, you might end up with "SSL Mixed Content Error". To avoid this, install and activate "Really Simple SSL" plugin.
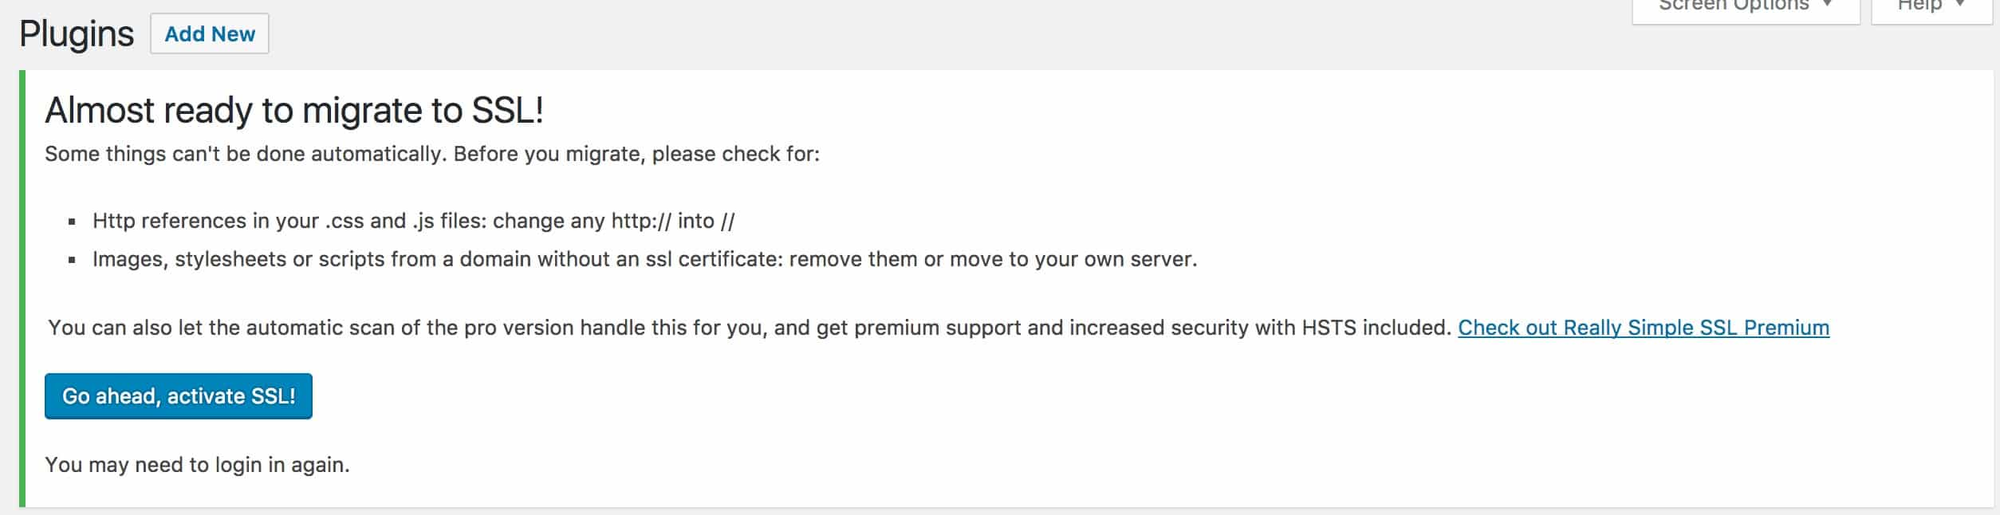
Step 8: Once activated, you will see the following message. Click "Go ahead and activate ssl" option. You might have to log in again into your dashboard after enabling this.
That it. SSL will be activated throughout your website. Let me know if you face any errors during the setup. You can contact me via admin@comtechies.com for end to end wordpres setup.
