

In this guide, I will help you create a landing page in Kit for your Newsletter with a few simple steps.
Before we begin, let's understand the purpose of a landing page.
A landing page is a single web page that focuses on capturing visitors as leads or converting visitors into customers.
It can be used for events, newsletter sign-ups, products, waitlists, eBooks, and more.
This will be very useful for your email marketing efforts.
Lets start creating your free landing page.
Steps to Create a Landing Page in Kit(ConverKit)
Follow each step one by one to create your page without any confusion. First, log in to your Kit account.
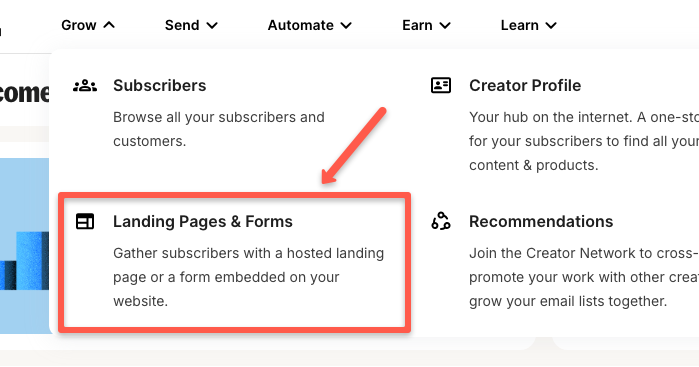
Step 1: Go to the Grow Section
In the dashboard, you will see the Grow option in the navigation bar. Click on it.

Step 2: Choose Landing Pages & Forms
Under the Grow section, you will find the landing pages and forms section. Click on it.
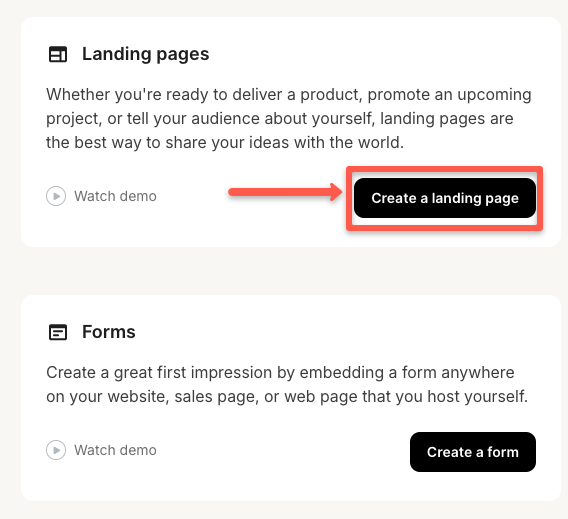
Step 3: Select Create a Landing Page
Now, click the Create a landing page button to start building your page.
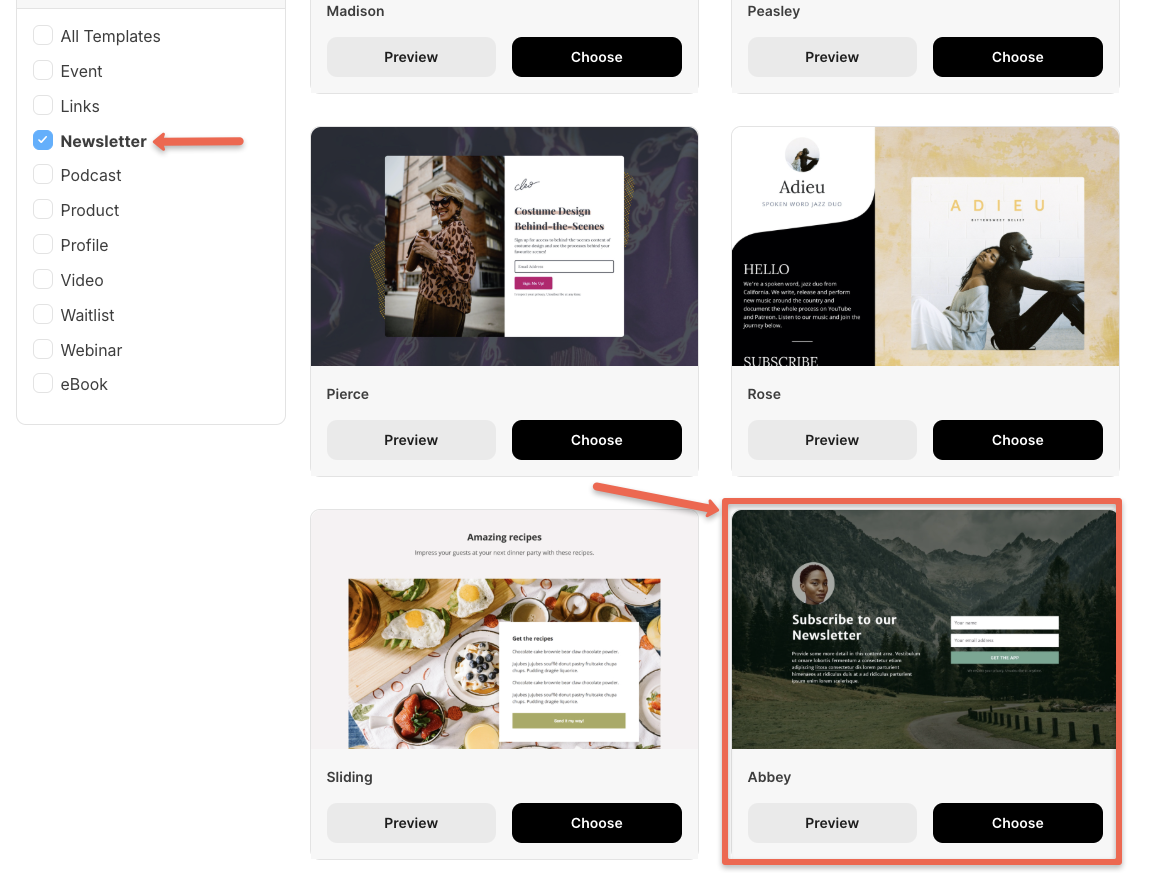
Step 4: Select and Edit your Template
Choose a template based on your goal, whether it is to gain subscribers, for your products, or any other category.
Actually, Kit has 10 categories, such as Event, Links, Newsletter, Podcast, Product, Profile, Video, Waitlist, Webinar, and eBook.
For instance, I am choosing the Newsletter category because I am currently on a path to build subscribers.
So, I choose the Abbey Template, it will be perfect for capturing subscribers.
So, now you can edit your template to align with your brand theme and goals.
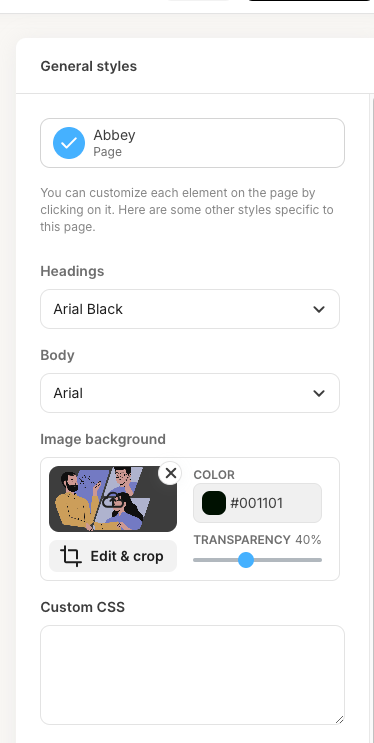
In this edit option, you can add a custom field, change the image font, size, style, weight, colour, border radius, and colour.
You can see, here is how I customized the page to match our brand theme, which is shown in the image below.

Now you have edited and are ready to publish the page, right?
But before that, you have to do a few things.
Step 5: Configure Settings
Click the settings option in the top-right corner.
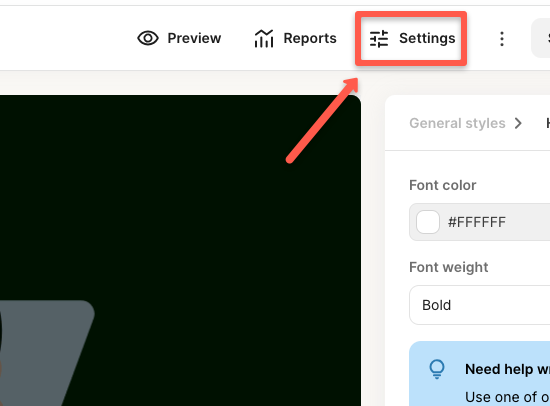
You will get a page as shown in the image below.
Let me explain what you want to do in the landing page settings.
The first one is the General option.
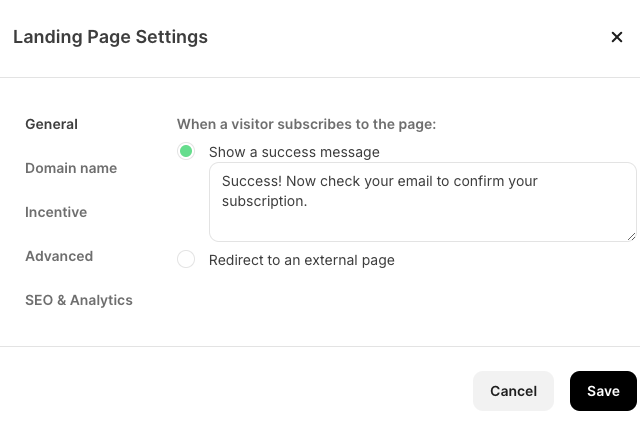
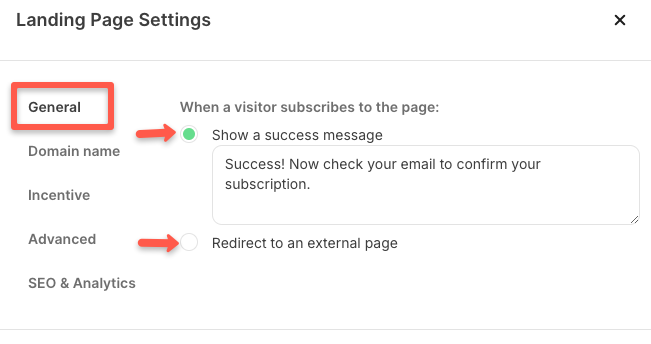
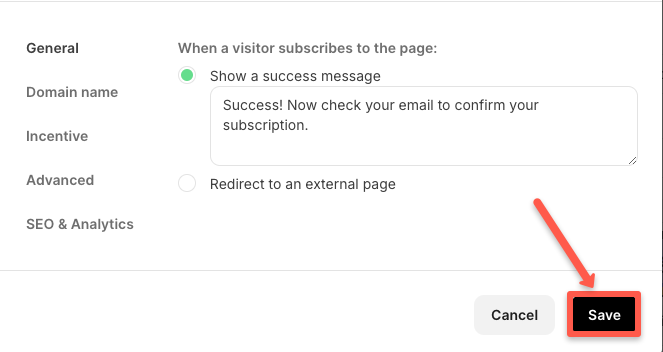
General
First, go to the General section, where you will have two options. One is to display a success message and redirect to the external page options.
The Success message is displayed when a user enters their email and clicks subscribe, and then it instantly shows the message that you provided.
Redirect is for, if you give the home or other pages link, once the user subscribes, it will redirect to the given page.
It is your choice and strategy.
Domain Name
If you have a custom domain, you must add it to Kit before you start creating a landing page.
If you don't have a custom domain, it will display only the kit's default domain name, like in the image below.
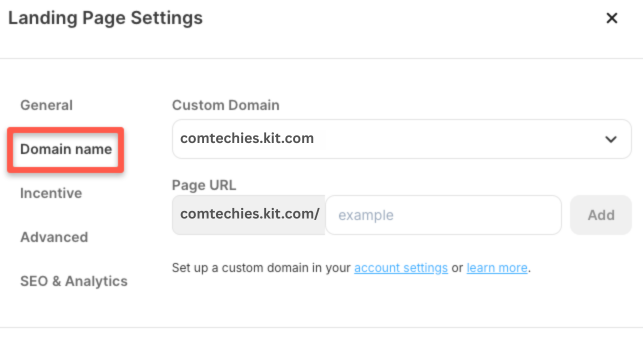
If you want to add the landing page or another page of yours, you can add it to the Page URL box to redirect.
Incentive
The incentive feature is to double-confirm the subscription, send the downloadable PDF or other, and redirect URL.
I know you are not clear yet, let me explain.
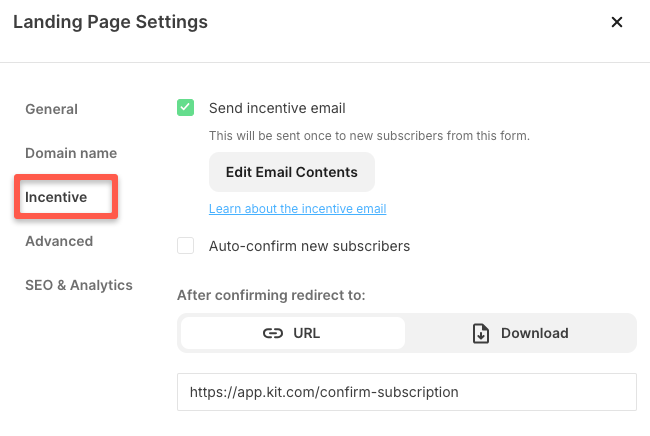
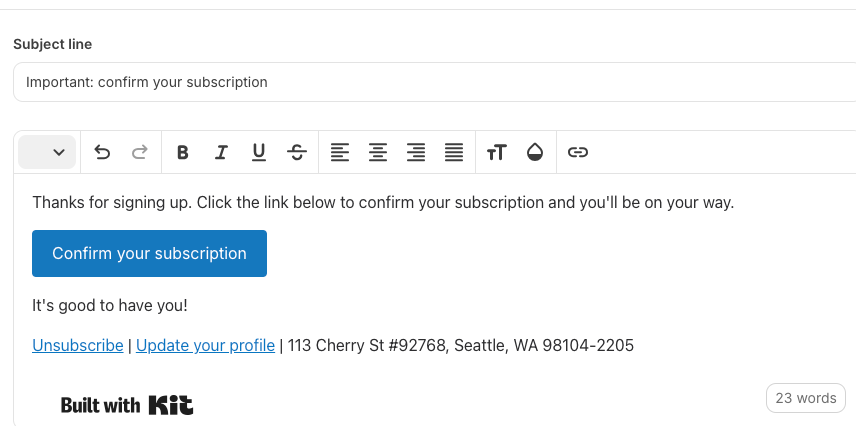
First, lets look at the Send Incentive email(confirmation email).
Click on the Edit Email Contents button to edit the content of the double-opt-in confirmation email.
This option is to confirm the subscription if anyone subscribes to your newsletter. The subscriber will be added to your network only if he/she confirm the subscription.
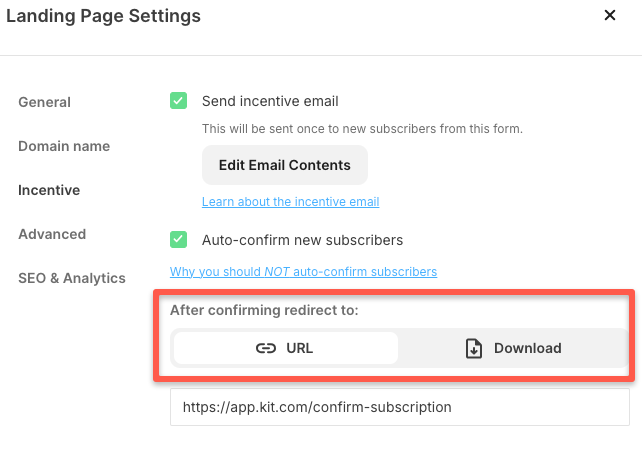
And, if a subscriber wants to automatically confirm on your subscriber list, then turn on Auto-confirm new subscribers.

Next, once the user confirms the subscription, you can choose which landing pages they want to redirect to, and you can also add a downloadable kit.
Advanced
In the advanced section, the first thing you see are three options,
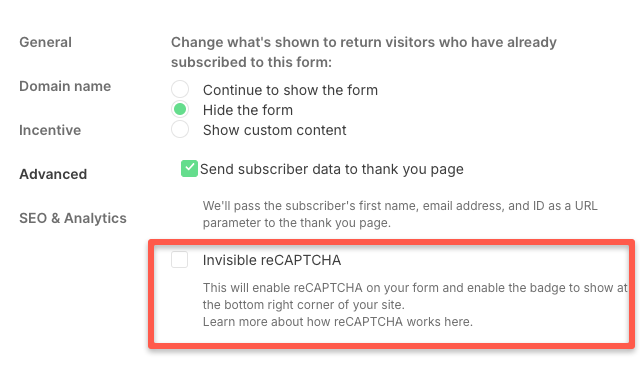
- Continue to show the form
- Hide the form, and
- Show custom content
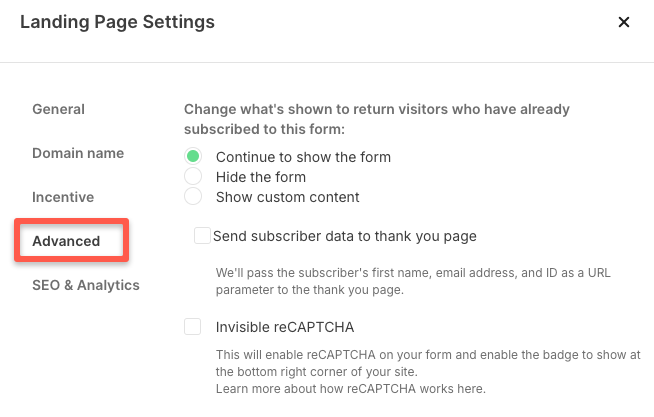
It means that once the user subscribes using your form, after they visit the same page using the link, you can decide whether to show the same form, hide the form, or display custom content that you have provided.
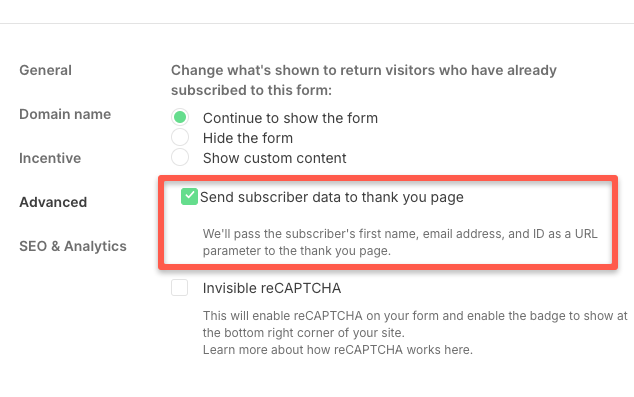
Next, enable Send subscriber data to thank you page. It will show the subscribers, name, email address, and ID as a URL to the thank you. This will give the user some meaning.
Finally, the Invisible reCAPTCHA option. This will help to prevent the bot signups. But this may affect your human subscribers while they try to subscribe.
So, I recommend keeping this feature turned off.
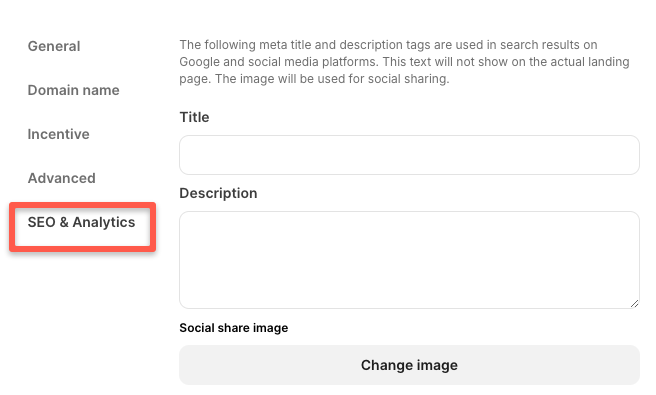
SEO & Analytics
This section is for SEO optimization to be visible on Google, and choose an image that will be used to share on social media.
Now, if you scroll down, you will see analytics tools such as Google Analytics, Facebook Business, Segment, Fathom/, Pinterest, Sparkloop, and Google Tag Manager.

You can integrate these tools with Kit for analytics purposes.
Once all changes are done, click the save button.
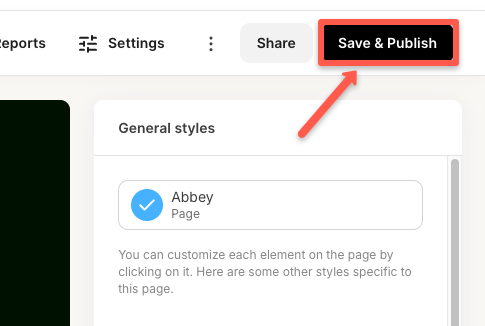
Step 6: Save & Publish
After completing all the customizations, click Save & Publish to finalize your landing page.
Step 7: Embed in Your Website or Share
Click on the Share button at the top, and you will get your landing page URL, like in the image below.
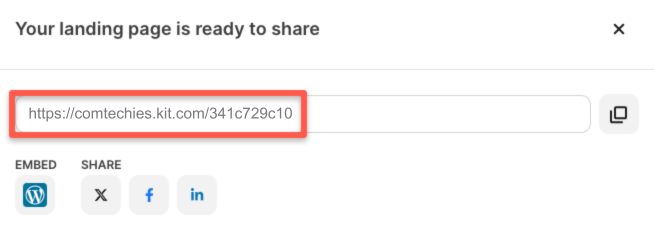
To embed this URL in WordPress, you need to install the Kit plugin. Also, you can share this URL on your X(Twitter), Facebook, and LinkedIn.
That's it. These are the steps to create your landing page in Kit.
FAQs
The following are the questions that most of the beginners in Kit are asked.
1 Can I create a landing page on Kit?
Yes, you can create a landing page in Kit, and you can customize it based on your brand theme and style.
2. What is Kit landing page?
Kit's landing page is designed to capture emails, promote offers, sell products, and more. You will get a pre-built template and edit it according to your needs.
3. Can I add a downloadable file to my Kit landing page?
Yes, you can add the downloadable file to your Kit landing page to gain your subscribers trust and the quality of your content and work.
4. Can I use Kit without a custom domain?
Yes, you can use Kit without a custom domain and use the default domain provided by Kit.
Conclusion
In this guide, I have taught you a step-by-step process of creating your first landing page in Kit.
This feature will be very useful for your email marketing, and I even got more subscribers and promoted our discounts through this page.
So, if you still have any doubts about creating a landing page or any options in it, please drop a comment!
I will clear it instantly.
But, to get a bigger discount, purchase it during the Kit Black Friday sale.